Printing reports
To print a report, go to the Reports toolbar and select a report in the Reports section. Use the up/down buttons to scroll in the list of reports. Click on the drop-down button in the bottom right corner of the Reports section to get the complete list of available reports.

When you click on a report, you will get the print preview window:
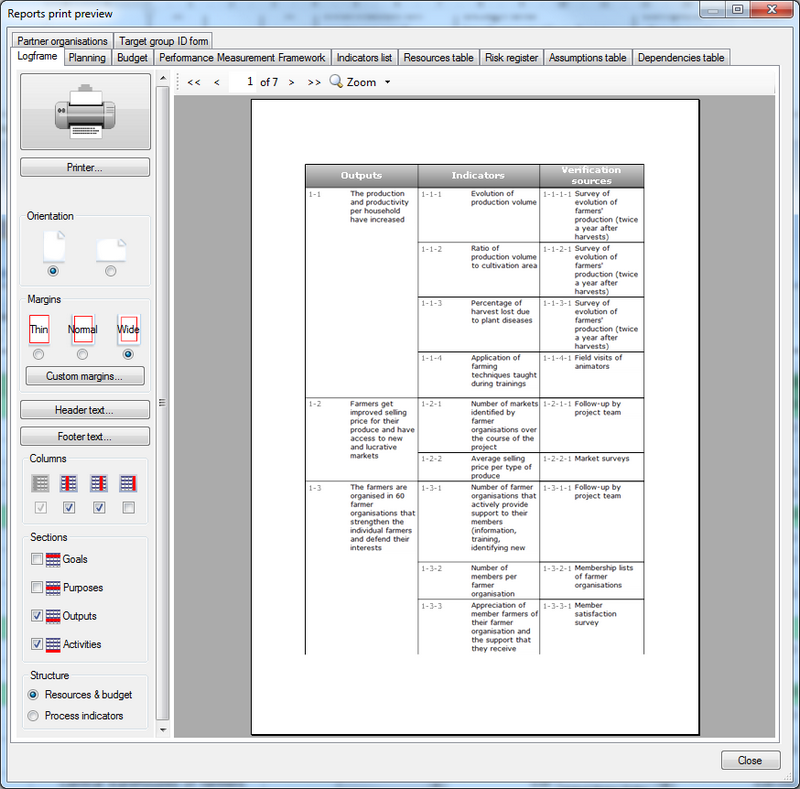
On the left side of the print preview window, you can see the print settings bar. On the right side you can see the print preview of the report in question. You can look at other reports by using the tab selectors at the top of the window.
Print settings:
- Click the big printer button to start printing on your default printer
- Use the Printer… button to select another printer or set specific settings for your printer
- Choose portrait or landscape orientation. Logframer will present some reports by default in landscape mode because they are relatively wide because of their nature
- Select thin, normal or wide printer margins. You can also set custom margins using the Custom margins… button
- Set the header text. You can optionally copy the header text to all report headers of your project.
- Set the footer text. You can optionally copy the footer text to all report footers of your project.
Report specific settings: these can be found below the general print settings. They allow you to print only certain types of items or information.
Width: enter how many pages wide the report can be. It is possible that the report needs more space than you wanted, so Logframer will increase the number of pages.
Headers and footers
For each report, you can set page headers and footers. To do so, press the Headers... or Footers... button in the Print Settings Bar.
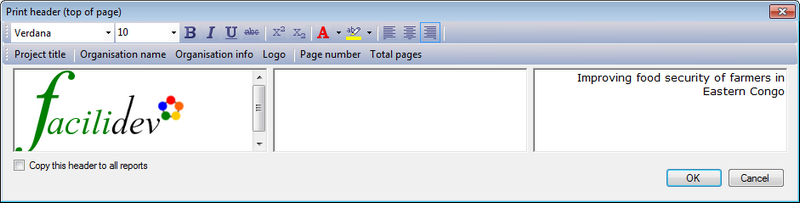
There are three text areas: on the left, the centre and on the right side of the page. You can use all text options (bold, italics, text colour...)
Insert project title
To insert the title of the project, click on the Project title button in the bottom toolbar
Insert organisation info and logo
If you've used the My organisation dialogue to provide details about your organisation (name, address, logo, etc.), you can use three buttons to insert this information directly in your header:
- Organisation name
- Organisation info: name of your organisation plus main address, main e-mail address and website
- Logo: inserts the logo of your organisation if you've loaded it in the My organisation dialogue
Insert page numbers and the total number of pages
To insert page numbers and/or the total number of pages, you can use the buttons on the right of the toolbar. Simply click with the text cursor on the place where you want to insert the page number, and then click on the Page number button.
A place-holder text will appear {&Page} that will be replaced by the actual page number in the preview or printed document. You can format this place-holder like you would any other text.
Copy the header/footer to all other reports
If you want the exact same header or footer on all your documents, you can check the Copy this header to all reports option (or Copy this footer to all reports option) on the bottom left of the dialogue. When you press the OK button, all other reports get the same outlook.